Saturday, September 30, 2006

Project Classes

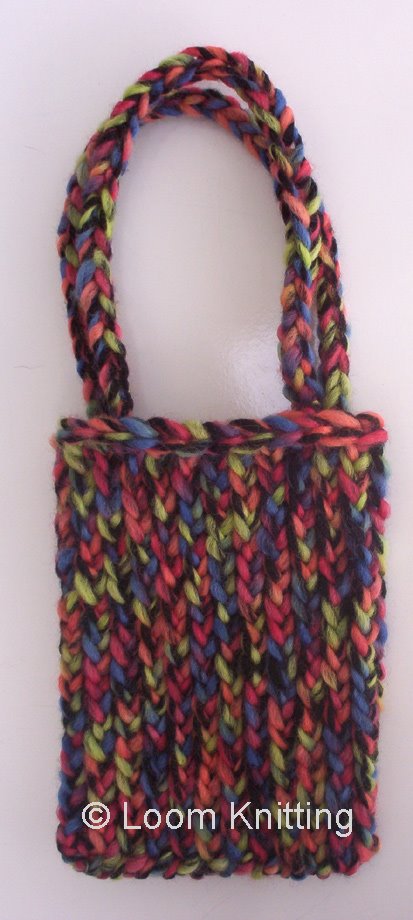
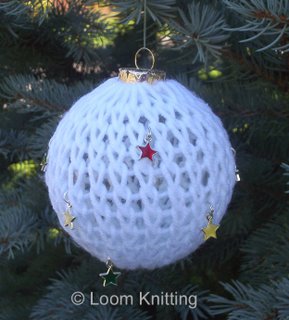
I've been changing over my class offerings from technique-based classes to project classes. I now have four beginning project classes: a hat class, a mini-purse class, a wine bottle gift bag class, and a holiday ornament class. Here's a sample ornament (the other samples are pictured in earlier entries):


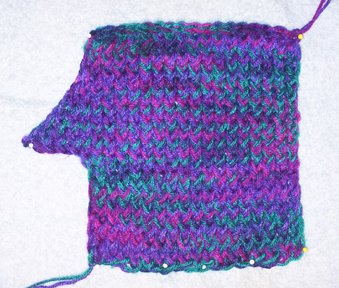
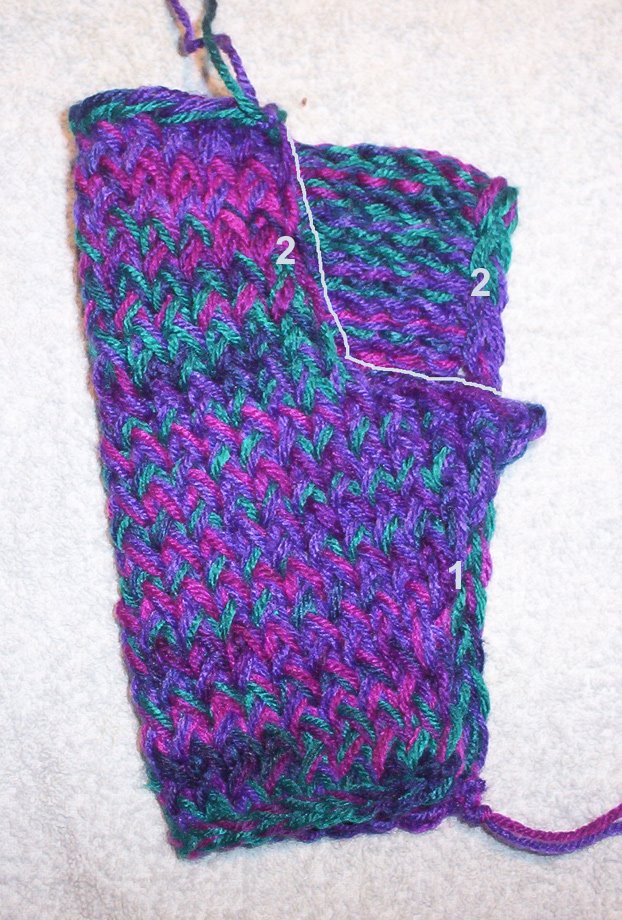
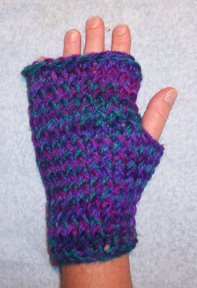
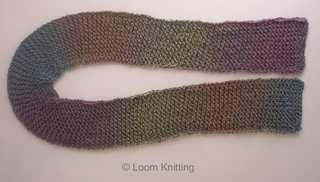
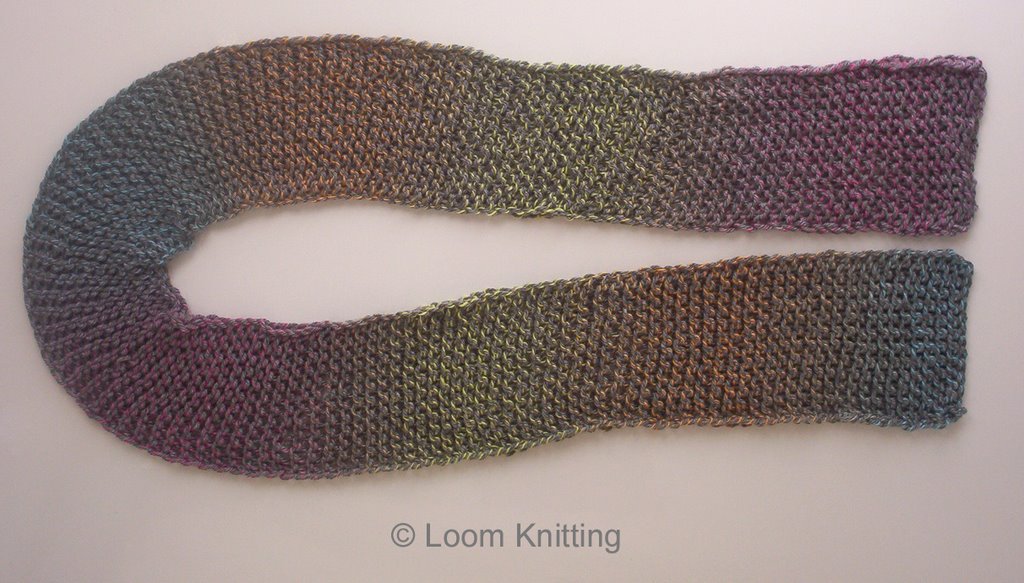
I'm offering two intermediate classes: the mittens, and a garter stitch scarf. This sample scarf was made with a single skein of Caron Simply Soft Shadows in Mardi Grey. The subtle striping changes are kinda fun!


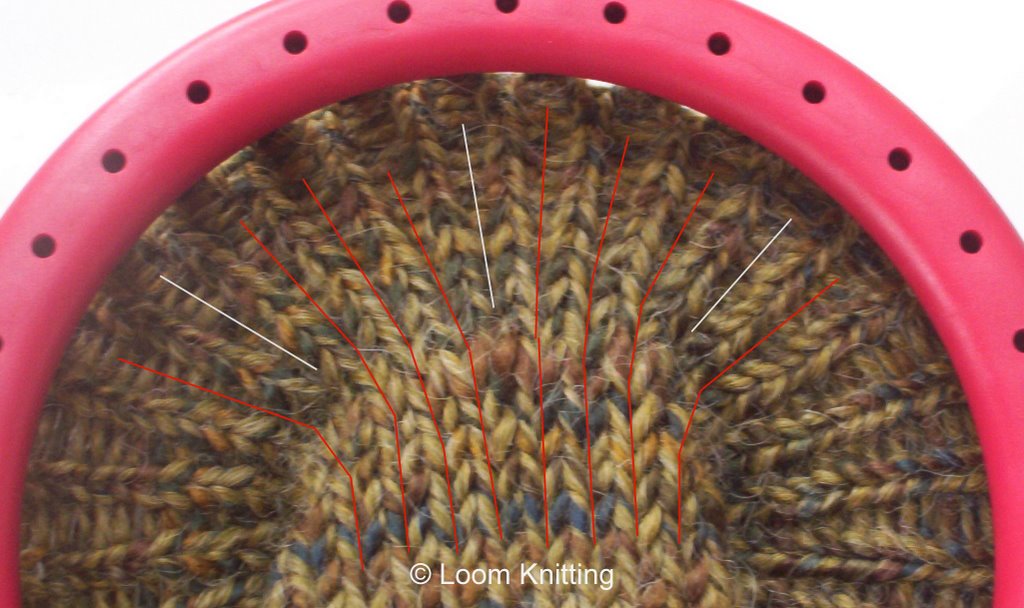
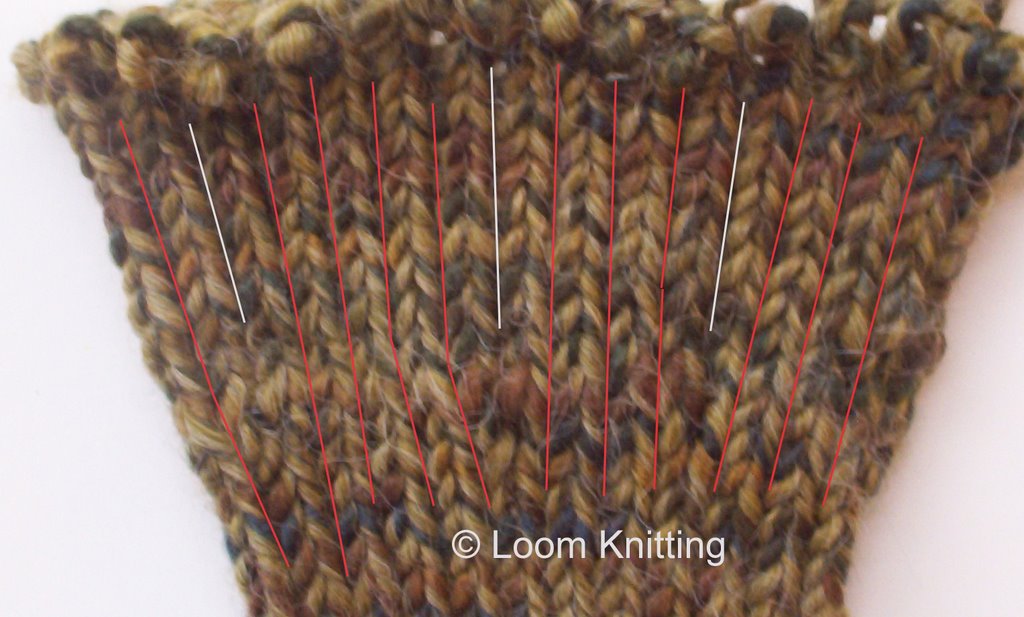
I am still offering a long loom techniques class, which includes various cast on methods, and a variety of stitch patterns. Also, there is a round loom techniques class where students can learn what they would like at their level, either very beginning techniques, or stitches they don't yet know, or stitch patterns such as lace, bobbles, cables, etc.

Friday, September 29, 2006

Book Orders Being Accepted

My website is now set up to take advance orders for Learn New Stitches on Circle Looms. The book is due out on December 15, 2006. Orders will be shipped on or as soon after that date as possible.

Sunday, September 24, 2006

The Stash

Today, I had a block of time that allowed me to tackle a project I've been meaning to work on for some time: gather all the yarn I had stowed in various parts of the house and figure out what I have. In the process, I discovered several looms that had gone AWOL, several UFOs that I had no idea what they were supposed to be or else I had no desire to finish (rip-it, rip-it!), and one project that I've been wanting to work on, but didn't know where it was hiding.


It looks impressive, but it really ain't. Most of it is odds and ends. Some of it was given to me, and some I can't recall why I bought them in the first place -- clearance sales, perhaps? The baggies in the upper right corner are full of yarn tails I've been saving for Deb who uses them to make afghans to donate to charity.

For now, I've sorted everything into self-close baggies (no loose yarn ends to tangle!), and put them in bins. I have a lot of single skeins, and a lot of partial skeins, that I wouldn't miss if never saw them again. I'll have to find a local charity where I can donate them -- someplace that will make good use of them and where I won't have to pay a small fortune in shipping! I've got a bin and a little more of bags of matching skeins that need to decide and tell me what they want to be. And I've got all my UFOs in one bin, which will make it easy to grab one to take to work or to a co-op class.

Thursday, September 21, 2006

Mittens Pattern Available

The Fitted Mittens pattern is now available on the Loom Knitting website.


I first started on these over the summer. I was playing with the new long looms, and developed a BBQ mitt using cotton yarn. I wanted the thumb of the mitt to correspond to where the thumb is on the hand, especially for grabbing hot packets of food. I even played with paper patterns for a thumb gusset. I haven't finalized that pattern -- my husband and daughter both had a number of design change requests -- but I did come up with the idea to knit the thumb as part of the mitten body, instead of it being an appendage that gets attached to the side. And I incorporated that thumb design into this mitten pattern.

What I especially like about these mittens is that the tips for the thumb and fingers are rounded to fit the contour of the hand. (I like doing things like figuring the proportions of the short rows to accomodate different finger lengths.) There aren't any large 'air pockets' with these mittens. They fit well, your hands don't swim in them, there's no bulky gathering, and you could wear silk glove liners with them for added warmth. I'm actually not much of a mittens person, but these are so comfortable that I'll be wearing them while driving in the bitter cold MN winter this year.

When I first started refining this pattern, it took me about three hours to knit a mitten. I have knit so many of these, both to perfect details and to test the five different sizes, that now I can do one in about an hour. These would be great charity knitting items. I can't wait to teach this pattern for my Mittens class at Michaels in early November.

Wednesday, September 20, 2006

New Free Patterns available

The patterns for the Wine Bottle Gift Bag and the Mini Purse are available at LoomKnitting.com. They are free!

The long-awaited mittens pattern should be there tomorrow. It's a 'for sale' pattern (with five sizes!), and the set-up process is a little more complicated. I'm just too tired to complete it tonight.

Monday, September 18, 2006

Increasing Stockinette Stitches

I've almost finished with the mitten pattern I'm working on. For the largest sizes, I needed to make the hand wider, which meant moving the knitting from the blue KK loom to the red KK loom. With a seven-peg difference, it is a challenge! However, I think I have it conquered.

With the stockinette (flat knit) stitch, it helps to have some slack in the travelling yarn between the two pegs where the stitch increase will happen. I prepare to add a stitch in the row before the row where the stitch gets added. I do this by knitting a peg, wrapping the working yarn around the peg, then knitting the next peg. The first peg now has two loops on it. I remove the top loop, twist the yarn, and put the loop on the second peg. On the next row, I knit the first peg, then knit the top loop on the second peg (the new stitch), transfer that loop to the first peg, then knit the second loop on the next peg.

I did this on seven pegs on the blue loom, evenly spaced around. I then had the 31 loops needed to transfer from the 24 peg blue loom to the red loom. I knit a few rows on the red loom so you can easily see where the additional stitches were added (white lines). This technique does not leave a hole in the knit work like other increase methods do; the key is to put a twist in the travelling yarn being used to create the new stitch.


Here's how it looks off the loom (the tube got rotated).

Sunday, September 17, 2006

Glasses Case

Every once in a while, you just gotta make something simple. When my daughter's science lab kit came with safety glasses, the Mom in me envisioned scratches on them before the week was out. A loom-knit storage bag was in order! Allegra rolled her eyes. Her favorite color is black, so black it had to be. This was done on the KK blue loom with a single strand of worsted weight yarn using a one-over-two e-wrap stitch. There are eyelets for the I-cord drawstrings; they are about an inch from the top, allowing the bound off edge to roll. The cast-on edge is seamed at the bottom of the bag.


When dd saw it, she said, "Cool." Good, at least she'll use it!

Thursday, September 14, 2006

Provo Craft's Fingerless Gloves pattern

9/18/06 update: I got a note back from Clella at Provo Craft today. She agreed there was an error in the pattern on step 2 and that the decreases should only be on the thumb extension side of the glove.

There's been some discussion on the Michaels KK Teacher's board about the Provo Craft pattern for fingerless gloves that we were given as a demo project. The pattern seemed to be confusing, and IMO, has an error. The following are my summarized directions and comments (italicized) on the pattern (left hand only). I used two strands of variegated worsted weight yarn, and the glove is plenty warm!

Step 1: Cast on to 19 pegs. Peg 2 is to the right of peg 1. Knit as a flat piece for 12 rows. This is the part that covers the fingers. I would do 6 rows only.

Step 2: From peg 1, wrap pegs 24 – 20 for the thumb extension. Knit from peg 20 – 24, then 1 – 19. Do NOT decrease one loop here! Knit back from 19 – 1, then 24 – 21. Move the loop from peg 20 to peg 21 to decrease one peg. Keep knitting back and forth as a flat piece, decreasing one peg on the thumb extension side each time, until you are back to knitting pegs 1 – 19.

Step 3: Knit two rows on pegs 1 – 19.

Step 4: Switch yarns and knit 3 more rows. Bind off with a flat method. This creates a contrast cuff. The different yarn also gives the cuff a looser bound-off edge. I didn’t change yarns for the wrist cuff.

Here is what the finished knit piece looks like:


The cast on edge is at the bottom, the thumb extension is on the left, and the bound off edge is at the top.

The piece is knit upside down; the cast on edge goes at the finger tips, the bound off edge goes at the wrist.

You can see here how the piece will fit on the hand.


Step 5: Sew up the sides. The white line shows the edge of the knit piece. Sew up from the wrist to the top of the thumb extension (1). Then sew the seam along the index finger (2).


Here is how the glove looks on. I didn’t tack the three spots along upper edge between the fingers (step 9) as the glove is too big for me.


I would definitely make the glove shorter at the top, and longer at the bottom. I don’t like the tightness of the wrist, but I didn’t change to a stretchier yarn, either. I think it would turn out well with those changes, and it really is comfortable.

Friday, September 08, 2006

Book Name Change

My editor just told me the title of the book has been changed to Learn New Stitches on Circle Looms. It's still due out in December, 2006.

Friday, September 01, 2006

Mini Purse

Here's another simple pattern for my beginner classes. This mini purse is perfect to carry your cell phone, ID, credit card, and car key. What else do you really need? I've been using a little purse like this all summer, and it's been great!


It's made on the blue KK loom with an e-wrap stitch, seamed at the bottom, with two I-cord handles. The yarn is Patons Black Magic.